Creating a webform
New webform edit mode
When you have created a new webform and given it a title, you will be taken to the edit mode. There are four main sections on this page. Once you begin to add content to the form, each of these sections provides a lot of configurable options that might take a while to investigate.
The main sections are:
- Form components: Add and edit form components (e.g. textfields, checkboxes, etc.) here.
- Conditionals: Add conditional logic to the webform (e.g. when the answer to question X is Y, reveal a text area for the user to provide a comment).
- E-mails: Configure the email address that submissions are sent to. You can also customise the layout of the email template that is sent from the website to the associated email address.
- Form settings: Configure display, access and submission settings.
Creating a basic webform
To create something like this, follow the steps below:
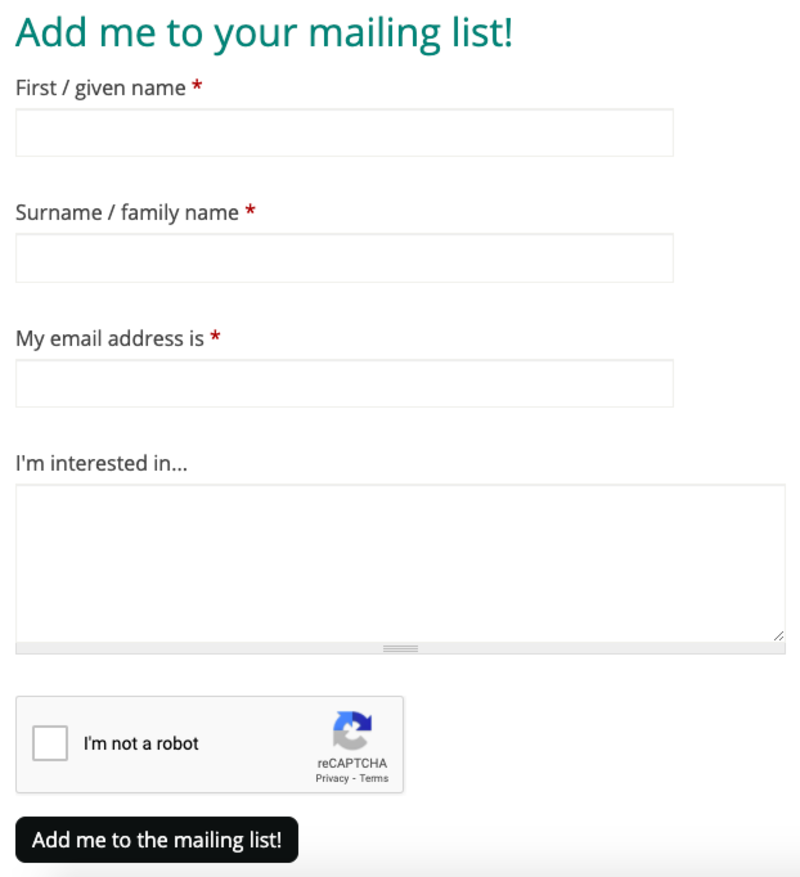
- Go to Manage Content > Webforms tab
- Create a new webform
- Give it a title, then Save
- Go to the Webform tab
Building the form
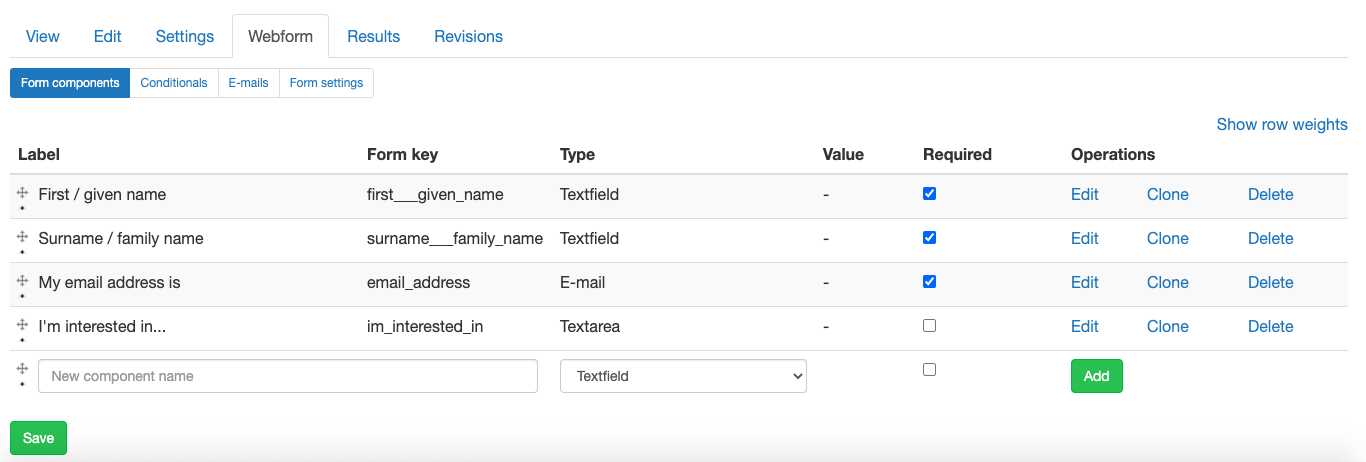
- On the Form components screen (see screenshot below):
- create a form component (field for the user to input information) by inputting a new component name
- specify which type of field it should be (using the ‘Type’ dropdown list)
- choose whether it is a required field using the ‘Required’ checkbox
- click ‘Add’
- On the next screen (the form component configuration screen), you can configure a number of settings, including:
- Description – text which appears when the user hovers their mouse over the field;
- Input field sizing – choose how the input field is sized (the configuration options vary depending on the type of field);
- Placeholder – set placeholder text for the field;
- Label display – choose where the label is displayed in relation to the field.
- If you are happy with the default settings, just click ‘Save component’. This adds the form component to the form.
Setting the submission button label and confirmation message
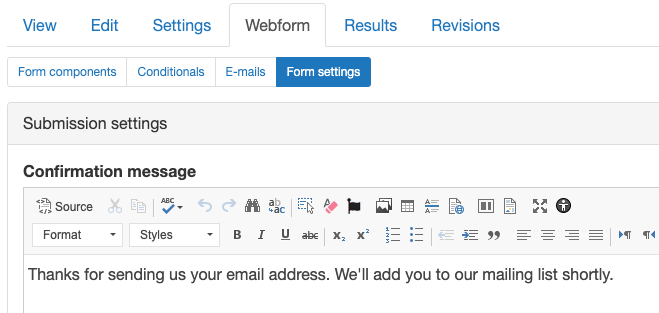
- On the Form settings screen, create a confirmation message (e.g. "Thanks for sending us your email address. We'll add you to our mailing list shortly") – you can use formatting for this as in a WYSIWYG:
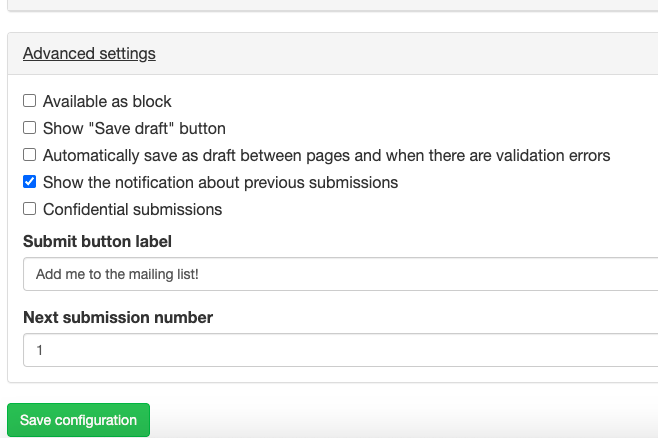
- In Advanced settings, edit the text on the Submit button (e.g. "Add me to the mailing list") and Save configuration:
Setting who can submit the form
On the Webforms > Form settings page, in the Submission access section (see screenshot below), the 'anonymous user' role needs to be checked in order for the form to be publicly visible.
The 'authenticated user' role provides access to Oxford SSO users when Oxford-only content restriction is enabled on a site.
Configure the emails that will be generated on submission
- Emails generated when a completed form has been submitted can be sent to multiple email accounts.
- On the E-mails screen, add the recipient email address for the webform submissions:
- To send emails to the person/address managing the webform (e.g. ‘webmaster@example.ox.ac.uk’), specify the address in the Address: field;
- To send copies of the completed submission to users, select the title of the email address form component from the Component value: field.

- When you click ‘Add’, you will see the email address configuration screen. On this screen there are several customisation options, including:
- the details in the email header: email subject; email from address; email from name – there are default settings for all three
- email template: either use the default template, or specify your own template (submission tokens need to be used in the template in order for values submitted in the form to appear in the email)
Every submission made via the form will be sent to the email addresses on the E-mails screen as and when information is submitted. The submissions will also be collated so they can be downloaded later.
Download form submissions in bulk
To download the submissions, go to the Results tab, then to the Download screen. On the Download screen, you can choose which file format you’d like the submissions to be exported in, as well as other configurations to review before downloading the file.
Embedding a webform on a page
A webform should be used by embedding it on a page. You can do this using the 'Form' widget in the widget dropdown list. By doing this, you can manage where the webform is placed on the page and place introductory text before the webform. If you want to add text in the middle of the form (between form components), you should create a new form component and set its type to 'Markup'.
How to embed a webform on a page:
Here is some guidance on adding your webform to a page.
- Once the webform has been created, go to the page you'd like it to appear on and add a new widget
- Select the 'Form' widget from the widget list
- Add a title to the webform (optional)
- In the 'Form*' field on the widget's editing screen, select the webform you'd like to use from the dropdown list of your webforms (see screenshot below), and Save
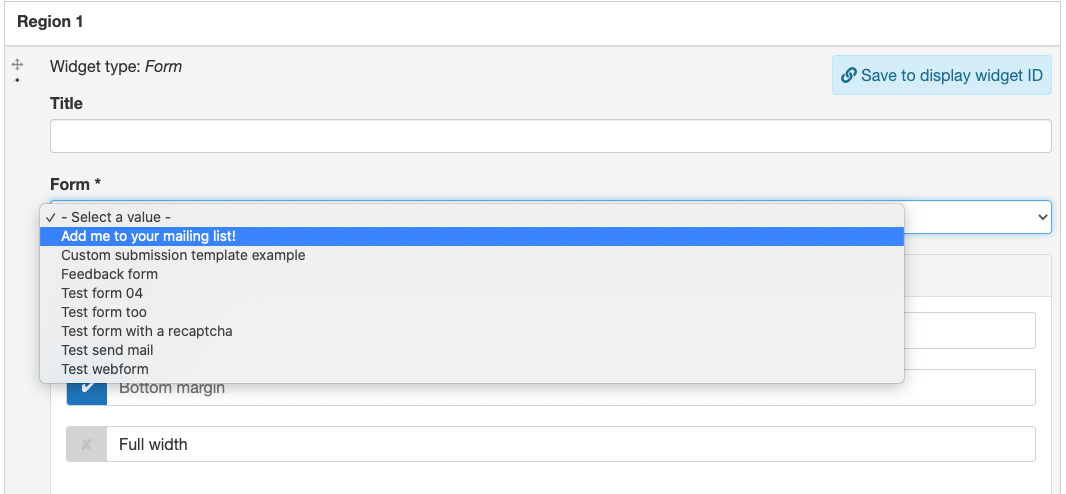
The webform should now be embedded on the page. To add introductory text, use a WYSIWYG widget on the page above the webform.


