reCAPTCHA setup
Google reCAPTCHA is a system which is added to webforms on Mosaic to protect them from automated attempts to submit information — i.e. it stops spam webform submissions.
A Google reCAPTCHA key must be set up on your site before you use either Simple Feedback form widgets or the advanced Webforms functionality, otherwise they will not be rendered.
reCAPTCHA key migration to Google Cloud
Google is in the process of migrating all reCAPTCHA keys (used for Mosaic Webforms) to Google Cloud. This work is due to be completed by the end of 2025. If you are the owner of a Google reCAPTCHA key, Google will email you about the migration and outline the actions required by you to complete the migration. (Look for an email with a subject line "Your Google reCAPTCHA keys are eligible for migration to a Google Cloud Project".)
If your Mosaic site contains a Webform, you are responsible for owning and maintaining a reCAPTCHA key for your site. The Mosaic Support team is not able to help with administration of your Google reCAPTCHA keys.
Important note: Fresco does not support Webforms. This is a good opportunity to convert your Mosaic Webforms to MS Forms, as per the Mosaic to Fresco Pre-migration Checklist. We recommend the use of MS Forms, available through Office 365, as a quick way to set up simple, low-traffic webforms. Forms can be included in Mosaic and Fresco pages using the embed code (see Microsoft's documentation on how to send and embed a form).
Please note, this process uses a service external to Mosaic. The guidance below includes steps within Google reCAPTCHA, but it may become outdated now that Google is migrating all keys to Google Cloud.
Also, as the service is external to the Mosaic platform, we're unable to provide support for issues you might encounter with it. For help, we suggest speaking to knowledgeable people in your unit or finding help online.
Setup a reCAPTCHA for your site
- Go to Site Settings > Form spam protection tab
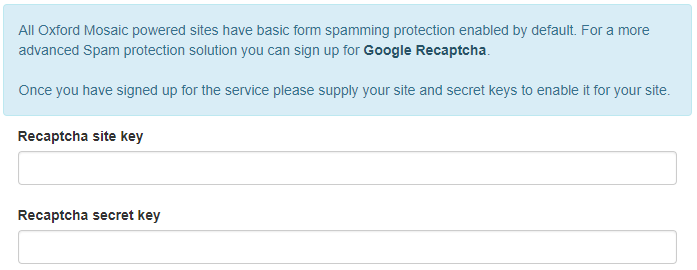
- Click the ‘Google Recaptcha’ link to go to the reCAPTCHA service's homepage
Tip: open the Google reCAPTCHA page in a new browser tab as you'll need to switch back to the Site Settings during the setup process - Go to the reCAPTCHA admin console (labelled 'v3 Admin Console' in the reCAPTCHA homepage menu)
- You'll be prompted to login using your Google account. If you don't have a Google account, you can create one at this point
- In the reCAPTCHA admin console: if you are creating your first reCAPTCHA, you'll now see the reCAPTCHA registration options. Otherwise, create a new reCAPTCHA by clicking the 'Create' ( symbol) button in the top-right of the screen
- On the 'Register a new site' screen (see also example reCAPTCHA registration below):
- Add a label to help you identify your reCAPTCHA
- Choose 'reCAPTCHA v2' > '"I'm not a robot" Checkbox'
Note: reCAPTCHA v3 is not supported on Mosaic - In the 'Domains' field, add each of your site's domains, including your [prefix].web.ox.ac.uk domain
- Make sure at least one Site Owner/Site Administrator is listed (by their email address) as an owner of the reCAPTCHA
- Check 'Accept the reCAPTCHA Terms of Service'
- Check 'Send alerts to owners'
- Click 'Submit'
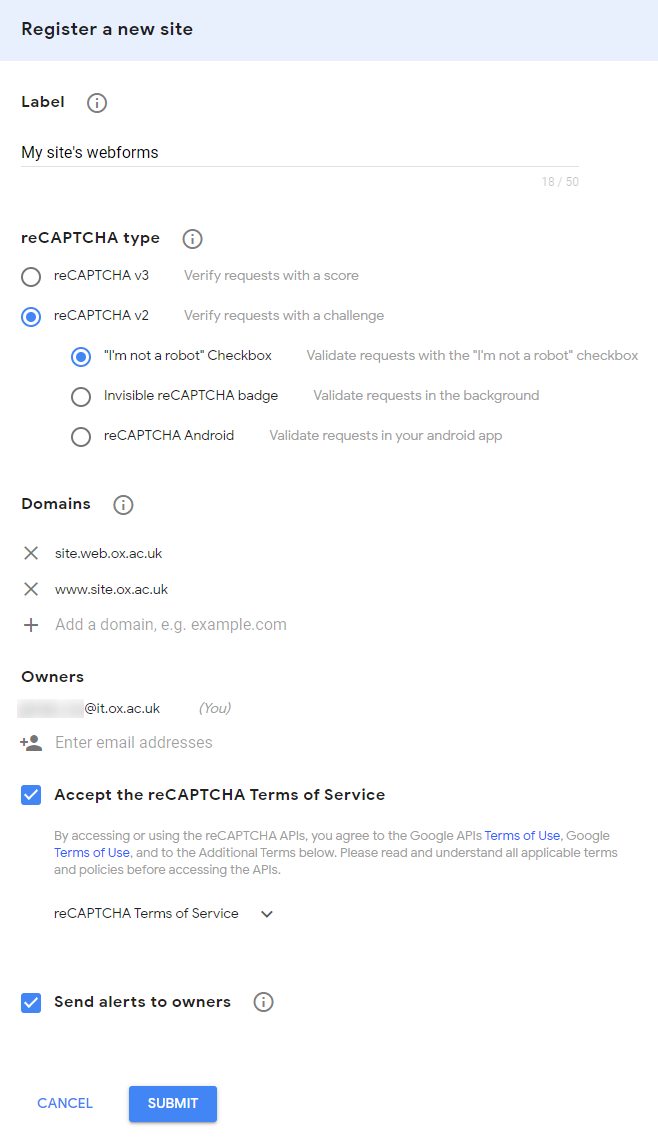
Example of registering a new site within Google reCAPTCHA
- After clicking 'Submit', you'll be shown the Site Key and Secret Key for the reCAPTCHA (mocked up example below). Copy and paste each key into the 'Recaptcha site key' and 'Recaptcha secret key' fields in the Site Settings > Form spam protection tab on your site
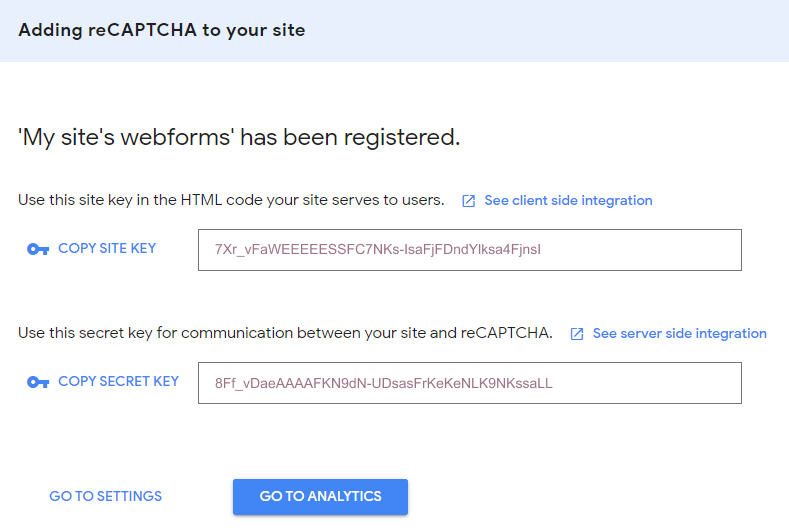
reCAPTCHA Site and Secret keys (mocked up)
- Save the Site Settings
reCAPTCHA display on Mosaic sites
When set up, reCAPTCHA challenges will automatically be added to all webforms and simple feedback forms on your site.
For website visitors, the reCAPTCHA will be displayed just before the 'Submit' button on forms — example below:
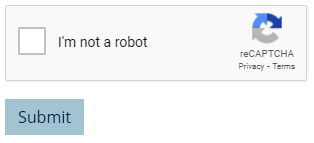
reCAPTCHA challenge displayed to website visitor
For logged-in content editors, the space occupied by the reCAPTCHA will display a message stating "reCAPTCHA enabled" — example below:
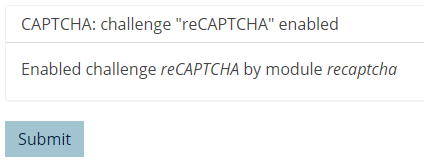
"reCAPTCHA enabled" message displayed to logged-in content editors
Troubleshoot reCAPTCHA errors
If your reCAPTCHA has not been set up correctly it will most likely display an error message. Two common errors are:
- "Invalid domain for site key"

A reCAPTCHA error indicating an invalid domain configuration
- "Invalid site key"

A reCAPTCHA error indicating an incorrectly setup site key
Resolve 'invalid domain for site key' error
This error indicates the domain you are viewing the webform on has not been added to the reCAPTCHA's configuration. To fix this:
- Go to the reCAPTCHA admin console
- Select the relevant reCAPTCHA from the dropdown list on the top-left of the screen
- Click the 'Settings' ( symbol) button on the top-right of the screen
- Ensure all your site's domains are listed under the 'Domains' section (see reCAPTCHA setup section 6.3, above)
- Save reCAPTCHA configuration
Resolve 'invalid site key' error
This error indicates there is a mismatch between the site key or secret key for your reCAPTCHA and one/both of the keys in your site's Site Settings > Form spam protection tab. To fix this:
- Go to the reCAPTCHA admin console
- Select the relevant reCAPTCHA from the dropdown list on the top-left of the screen
- Click the 'Settings' ( symbol) button on the top-right of the screen
- Click the 'reCAPTCHA keys' dropdown heading
- Copy and paste the Site and Secret keys into the 'Recaptcha site key' and 'Recaptcha secret key' fields in the Site Settings > Form spam protection tab on your site — check there are no extra spaces at the start or end of the keys
- Save the Site Settings on your site


